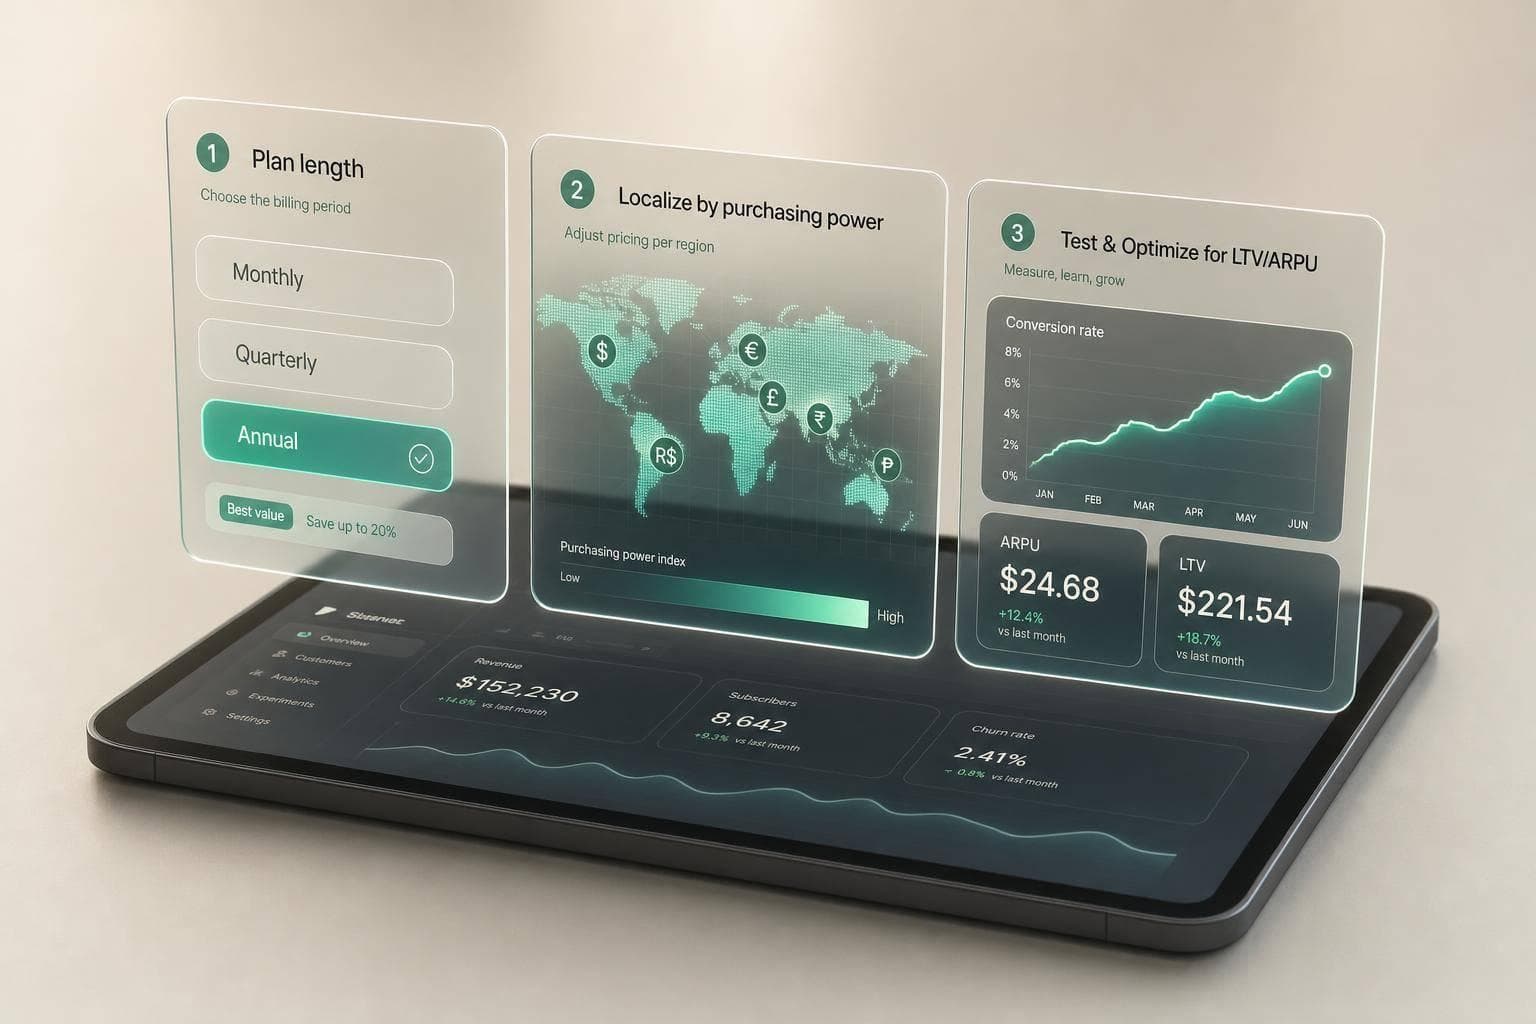
Most apps do better when they start with monthly + annual, then localise prices by market instead of relying on store FX conversion. That is the short version. The right setup depends on buyer behaviour, plan length, tier structure, and local affordability - not just the headline price.
If I were setting pricing today, I would keep the checklist simple:
- Pick plan length based on how fast users get value
- Use monthly + annual as the default, and add weekly only when the app pays off fast
- Use one plan unless user segments support tiers
- Start from a clean U.S. base like $9.99/month or $59.99/year
- Localise prices with purchasing power in mind, not FX alone
- Track conversion, Day 30/60 revenue per install, retention, and CAC payback
- Review prices every quarter, especially in markets with currency swings
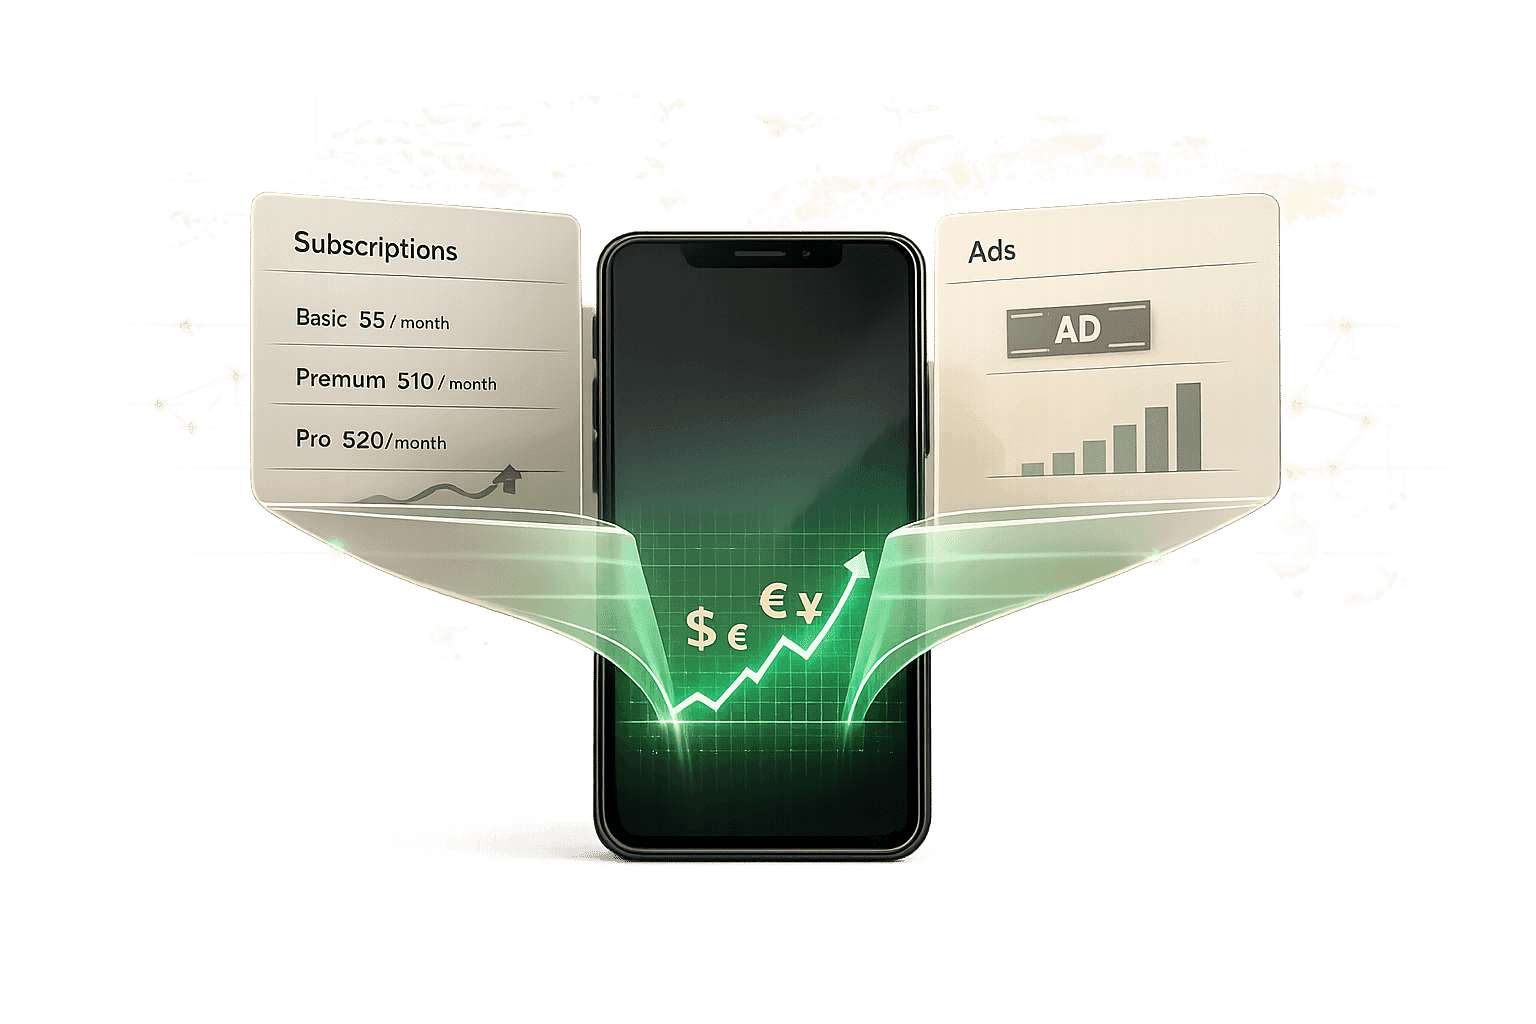
A few numbers make the case. Subscription apps can generate 4.6× higher ARPU than ad-only apps. But plan length matters: after 12 months, annual subscribers retain at 44.1%, vs 17.5% for monthly and 3.4% for weekly. Geography matters too: a $19.99 plan that feels normal in the U.S. can become far too expensive in India if you only convert by FX.
How to price your subscription app globally - Featuring Jacob Rushfinn
sbb-itb-43fe43a
Quick comparison
| Decision | Default choice | When to change it |
|---|---|---|
| Plan duration | Monthly + annual | Add weekly for immediate-use apps |
| Plan structure | Single plan | Add tiers when segments have different spend levels |
| U.S. base price | Clean anchor like $9.99/month | Move up or down based on value tier and test data |
| Local pricing | PPP-led localisation | Tune market by market where affordability gaps are large |
| Tool stack | Mirava for pricing analysis; RevenueCat, Adapty, Purchasely, Superwall for billing and paywalls | Expand testing once the base model is live |
My main takeaway: pricing works best when I treat it as a system, not a one-time launch task. I would set the pricing model first, localise second, then test against LTV and ARPU, not conversion alone.
Step 1: Match Your Pricing Model to Your App Category and Buyer Behavior
Identify which subscription pattern fits your app
Your app category gives you a strong starting point, but buyer behavior tells you what will actually work. Fitness apps often do well with annual plans. Utilities tend to fit weekly plans. Productivity apps tied to day-to-day work can beat trials with a direct purchase model. A simple way to sort this is by looking at return frequency and urgency: habit-led apps often support annual plans, immediate-use apps usually fit weekly plans, and workflow-critical productivity tools may do better with direct purchase than trial-first flows [6][7].
Estimate willingness to pay by user segment
Category sets the baseline. Segment tells you how far price can go. Not every user sees the same value, so pricing should reflect that. The Van Westendorp model is a useful way to set a testable price band by mapping four signals: too cheap to trust, a bargain, expensive but worth it, and too expensive [2][9].
Pick your KPIs before you pick your prices
Pricing without success metrics is a common mistake. Before you test anything, decide what “good” looks like. In most subscription apps, that means tracking:
- Free-to-paid conversion
- Trial-to-paid conversion
- Day 30 and Day 60 revenue per install
- 12-month retention by plan
- CAC payback
The retention spread between plan lengths is hard to ignore. Annual subscribers retain at 44.1% after 12 months, versus 17.5% for monthly subscribers and 3.4% for weekly subscribers [8]. If churn is high, that gap is a strong case for testing annual plans. Monthly can still play an important role when you need a lower-friction entry point. Once you know which model wins, you can move into plan duration and tier structure.
Step 2: Choose Your Plan Durations and Structure
Subscription Plan Duration Comparison: Conversion, Retention & Revenue
Once you know who buys, the next move is simple: decide how long you want them to commit.
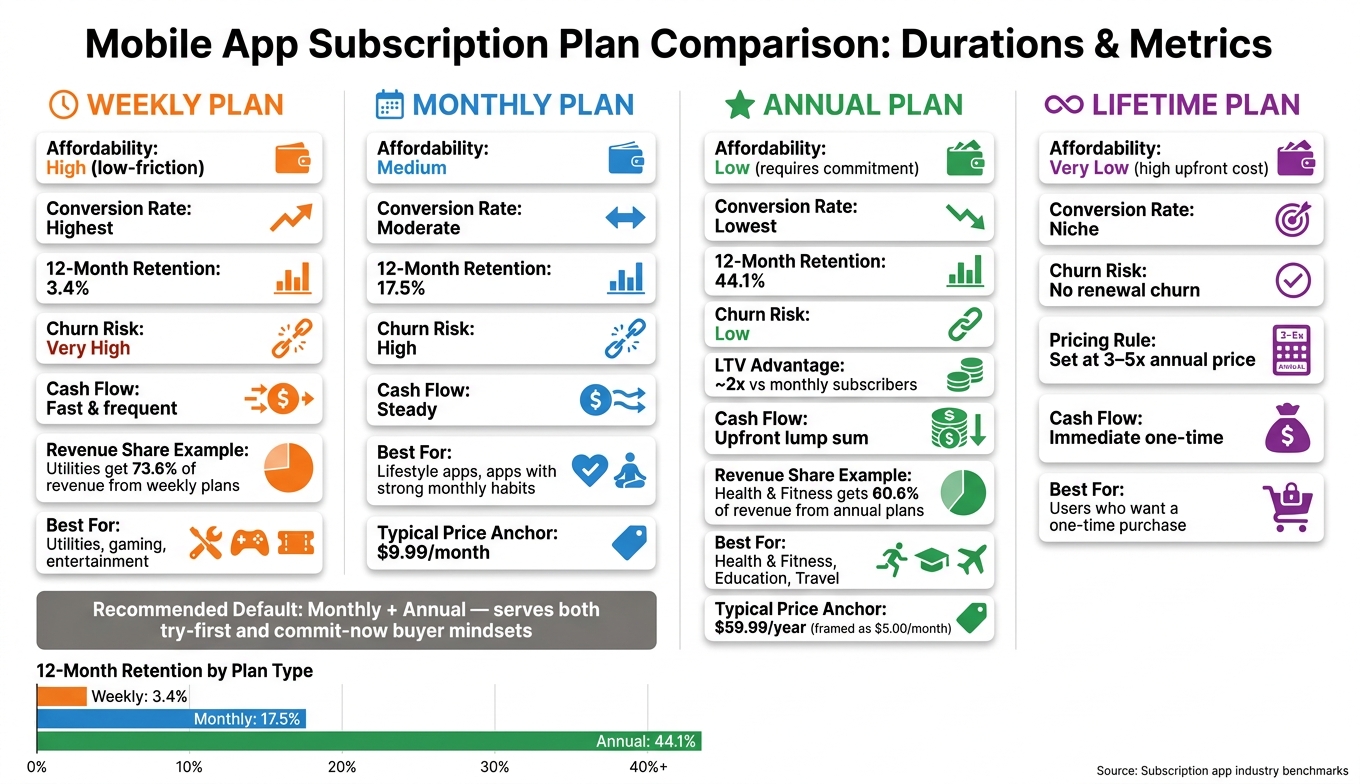
Weekly, monthly, annual, and lifetime plans compared
Plan length should match how fast users get value. Weekly works best when the payoff is immediate. Monthly suits apps people use as part of a routine. Annual fits users who already trust the product. Lifetime is mostly for buyers who want to pay once and move on.
Each option maps to a different buying pattern. Weekly plans have the least friction and usually convert best, but they also churn the fastest [7][10]. Annual plans give up some conversion volume, yet the users tend to be much stronger, with roughly 2x the LTV of monthly subscribers [11]. Lifetime pricing needs care: set it at 3–5x your annual price or you risk eating into recurring revenue [9][12].
| Plan | Affordability | Conversion | Churn Risk | Cash Flow | Best For |
|---|---|---|---|---|---|
| Weekly | High (low-friction) | Highest | Very high | Fast, frequent | Utilities, gaming, and entertainment |
| Monthly | Medium | Moderate | High | Steady | Lifestyle apps and apps with strong monthly habits |
| Annual | Low (commitment) | Lowest | Low | Upfront lump sum | Health & Fitness, Education, and Travel |
| Lifetime | Very low | Niche | No renewal churn | Immediate | Users who want a one-time purchase |
Use this matrix to narrow your default mix before you decide whether to offer one plan or several.
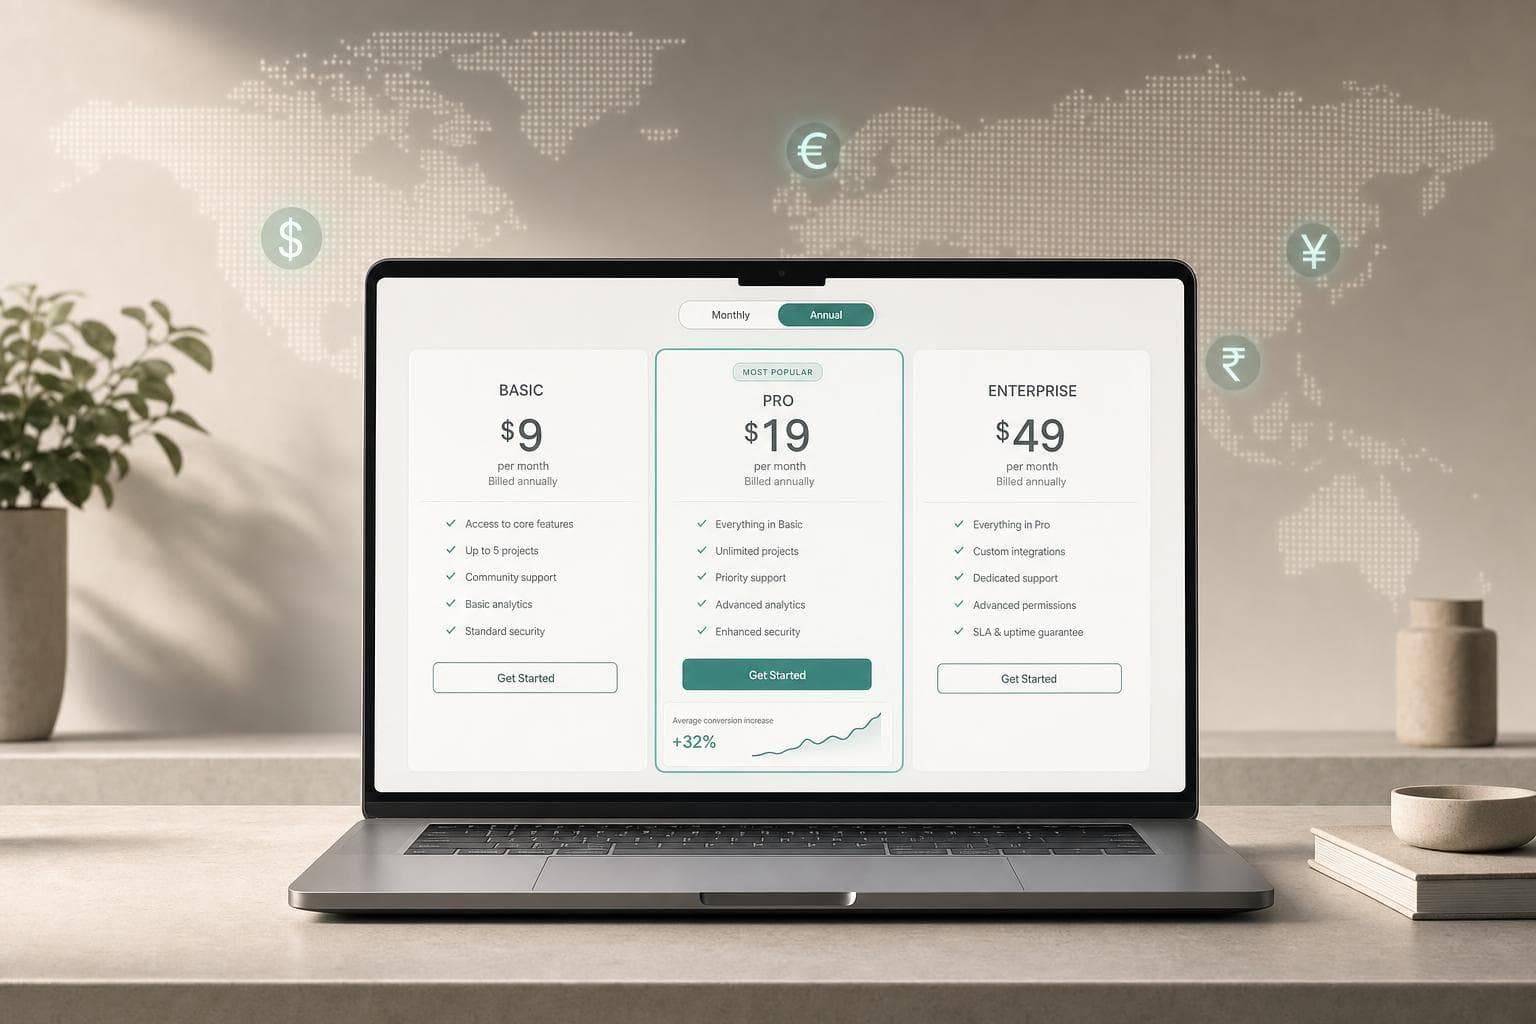
Why monthly plus annual is the right default for most apps
For most consumer apps, monthly plus annual is the safest starting point [7][9]. Monthly lowers the barrier to entry. Annual secures your best users before churn starts to stack up. Put together, they serve the two buying mindsets you see most often: let me try this and I’m ready to commit.
In the U.S. consumer app market, common starting anchors are $4.99/week, $9.99/month, and $59.99/year [7][9]. Framing the annual plan as a monthly equivalent helps too. A line like "$59.99/year - just $5.00/month" makes comparison easier and softens price friction [9][11].
Weekly is worth adding when the app delivers value right away. Utilities get 73.6% of revenue from weekly plans [7]. Health & Fitness leans the other way, with annual plans driving 60.6% of revenue [7][8]. Retention makes the trade-off plain: annual subscribers retain at 44.1% after 12 months, compared with 17.5% for monthly and 3.4% for weekly [8]. If churn is hurting you, annual deserves more attention.
Single plan or multiple tiers: how to decide
A single plan works when one user segment drives most of the value. Multiple tiers let you serve a broader range of willingness to pay, but they also make the paywall harder to get right.
Three tiers often work well because they anchor attention on the middle option [9]. That matters in practice. Tests on the number of plans shown on a paywall have delivered a 57.1% LTV uplift and a 46.1% conversion rate uplift [13].
| Feature | Single Plan | Multi-Tier (Basic/Pro/Premium) |
|---|---|---|
| Simplicity | High; no decision fatigue | Lower; potential for choice paralysis |
| Upsell potential | None | High; clear path to higher LTV |
| Paywall complexity | Low | High; requires careful design |
| Segmentation value | Poor | Excellent; captures different willingness to pay [9] |
| Category fit | New apps, simple tools | Productivity, professional, and team apps |
Whatever structure you choose, give each tier one clear difference. Storage limits, project caps, or AI request volume all work well. A long list of tiny feature changes usually muddies the decision [9]. Use Mirava to analyse and optimise tier pricing, then check billing, paywalls, and entitlements in RevenueCat, Adapty, Purchasely, or Superwall.
Step 3: Localize Prices Across App Store and Google Play
Once your plan mix is set, local pricing becomes the next lever. It decides whether those prices actually convert in each market.
Set prices based on local purchasing power, not a single USD rate
Don’t take a U.S. price and convert it by FX alone. A $19.99/month plan lands at about ₹1,660 in India on that basis, but a PPP-based price closer to ₹440–₹500 keeps affordability in roughly the same range [3]. That difference shows up fast in conversion data: lower local prices can lift both conversion and market share in a meaningful way [2].
Once you’ve picked the target price for each market, the next job is mapping it to Apple and Google Play rules.
How Apple price tiers and Google Play local prices work
Apple and Google Play handle local pricing in different ways, and that changes what you can set in practice.
Apple uses fixed price tiers by currency, so you pick the nearest tier instead of typing any price you want [3]. Google Play gives you direct control over local prices, but pricing now has to be managed at the product level [4].
Apple’s default suggestions can still miss the mark. In India, Apple often suggests pricing that is 21% lower than the U.S., yet many apps that have tuned pricing well sit 50% to 80% lower. In the U.K., Apple may suggest a 26% increase, while many apps instead price at about 10% below the U.S. base [2]. On Apple, use Preserve Price when changing tiers so current subscribers keep their rate while new users see the update [15].
Local rounding matters too. Use price points that feel normal in each market: $9.99 in the U.S., ₹499 in India, ¥480 in Japan, and R$19,99 in Brazil [3][15].
Build a regional ladder you can maintain
Start with the target price, then map it to each store’s pricing system. A simple rule works well at first, then you can tune the markets that sit furthest from U.S. purchasing power. The baseline formula is: (PPP_country / PPP_base) × base_price. The first markets that often need custom pricing are Turkey, India, Mexico, Brazil, South Korea, and Japan [15].
| Country | PPP Index (Approx. 2026) | Priority for Custom Pricing |
|---|---|---|
| Turkey (TR) | 0.28 | HIGH |
| India (IN) | 0.32 | HIGH |
| Mexico (MX) | 0.41 | HIGH |
| Brazil (BR) | 0.45 | HIGH |
| South Korea (KR) | 0.70 | MEDIUM |
| Japan (JP) | 0.72 | MEDIUM |
| United States (US) | 1.00 | Baseline |
Regional pricing is the third pricing decision after duration and tier structure, and it’s never a set-it-and-forget-it job. Currencies like the Turkish lira and Argentine peso can move 10% to 30% in a single year, and Apple also pushes mandatory tax changes at times, including a January 2026 update across 9 countries, which can affect manually set prices [3][14]. A quarterly review is a sensible cadence if you want to catch currency drift before conversion starts to slide.
Once the ladder is live, check whether local conversion, retention, and revenue per install move in the right direction.
Step 4: Launch, Test, and Revisit Your Pricing Model
With your plan mix and regional price ladder in place, the next job is simple: launch, measure, and keep learning from the data.
Set up your subscription products, paywalls, and entitlements and launch
Once your plan structure and regional prices are locked in, publish the subscription products in the App Store and Google Play. Tools like RevenueCat, Adapty, Purchasely, and Superwall help you manage billing, paywalls, and entitlements without shipping a new app build every time you change pricing [17]. That matters when you want to move fast without tying pricing work to release cycles.
On iOS, keep existing subscribers on their current price where possible, and roll price increases out to new cohorts first [2][12]. It’s a cleaner way to test price movement without adding churn risk to your current base.
Once pricing is live, don’t just look at top-line numbers. Compare performance by plan and by country. Aggregate data can hide what’s actually happening in each market.
Run pricing tests that look beyond initial conversion
After launch, test pricing against revenue, not just conversion. A drop in initial conversion doesn’t always mean the test lost. Sometimes users shift into a higher-value annual plan, which leaves the business in a better spot overall. The metric that matters most is ARPU or LTV, not conversion rate on its own [1][5].
For test setup, aim for at least 200 subscriptions per variant before you call a winner. In most cases, that means running the test for 2–4 weeks [1]. Track 13-month projected LTV alongside trial-to-paid conversion, 7-day cancel rate, and refund rate. Then split those results by market so the readout ties back to local pricing rather than global averages [16][17].
The 7-day cancel rate is one of the most useful early signals here. It gives you a quick read on whether a pricing change may hurt longer-term renewal behavior [16].
Teams that keep testing pricing tend to find gains others miss. Mojo ran nearly 40 pricing experiments over two years and increased annual prices by 50% in the U.S. and Germany with little effect on conversion. In Mexico, a 25% price cut lifted new revenue in that market by 25% [16]. That’s the kind of result that makes pricing work hard to ignore.
There’s also a clear pattern in test win rates. Pricing experiments succeed 56% of the time, versus 14% for design and layout tests [16][17]. If you’re deciding where to start, pricing usually deserves to go first.
Conclusion: A decision checklist for picking the right model
Use this checklist before launch, and again each time you revisit pricing:
- App category and buyer behavior: Match the model to the way users buy.
- Plan duration: Start with monthly and annual unless your data points to weekly.
- Plan structure: Stick with one plan unless user segments clearly support tiers.
- U.S. base price: Start from a clean USD price point that fits your app’s value tier.
- Regional localization: Use PPP-based pricing where purchasing power differs in a meaningful way.
- Implementation: Use RevenueCat, Adapty, Purchasely, or Superwall for billing and entitlements.
- Ongoing review: Recheck localized prices every quarter [3][9].
Pricing isn’t a one-and-done decision. The teams that grow subscription revenue over time are usually the ones that treat pricing as a repeatable discipline, not a launch task they finish once and forget.
FAQs
How do I know if my app should offer weekly plans?
Weekly plans tend to work best when app usage is short-term, seasonal, or tied to a hobby. They’re also a good fit when users don’t want to commit for long. In practice, that often means younger audiences, weekend-led usage, or utility apps built around events and time-bound needs.
From a pricing and retention point of view, weekly plans often convert better than annual offers. The trade-off is straightforward: they usually bring higher churn and lower long-term retention than monthly or annual options.
When should I use one plan instead of multiple tiers?
Use a single plan when your app offers one clear product and you want to keep the purchase decision simple. Fewer choices can reduce decision fatigue and help more users get to checkout. The downside is straightforward: you may lose price-sensitive users at the low end, and you may also leave money on the table with users who would have paid more.
For most consumer apps, three tiers tend to work well. They let you serve different user segments while nudging people toward a middle option. The key is simple: each tier needs a clear, meaningful difference. If the gaps feel thin or arbitrary, users notice fast.
How should I localize prices without relying on FX alone?
Don’t rely on FX-only auto-converted prices. Start with a PPP-based baseline for each country, then map that baseline to store-supported price points based on each platform’s rules.
Then apply market-specific rounding so prices feel normal to local users, and check performance through analytics such as conversion, retention, and LTV. Apple and Google default pricing mostly follows exchange rates and tax rules, which often misses local willingness to pay.